How the DXF Editor works
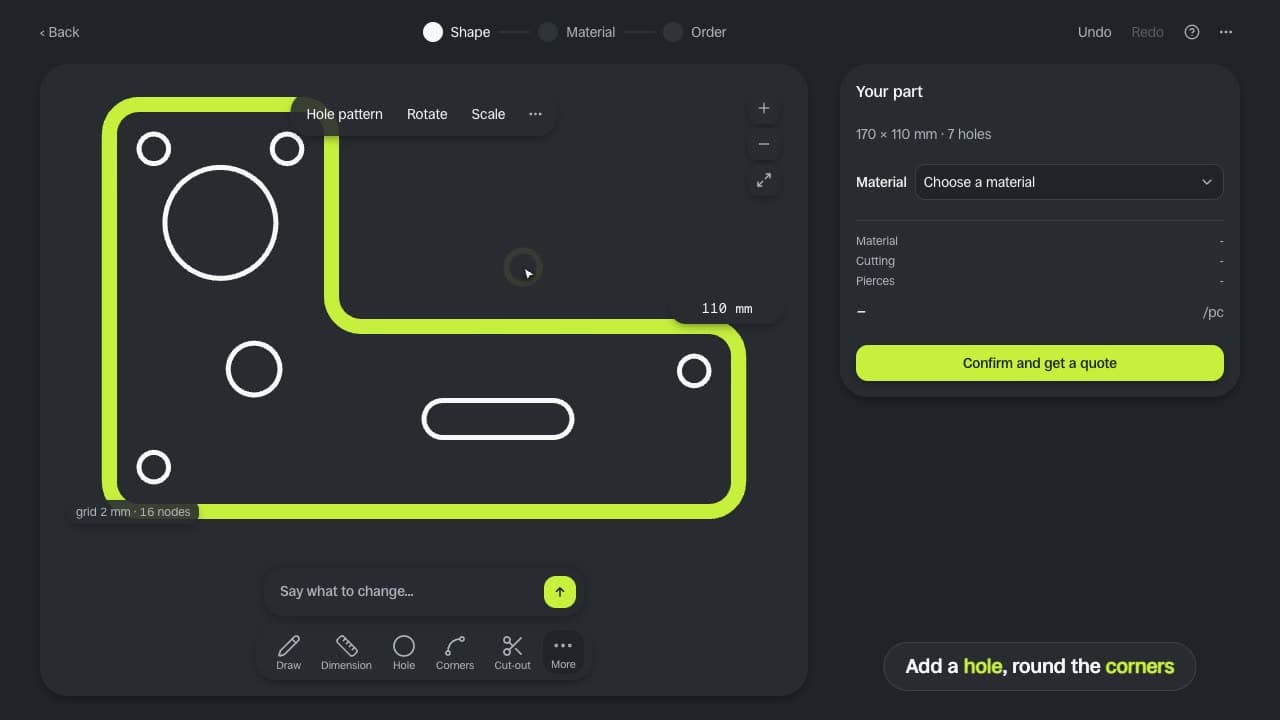
You can open a DXF file without AutoCAD in the DXF Editor at Cut It Fast: it runs in your browser, it is free and needs no account or installation. You draw a part from scratch or start from a file, a photo, a ready-made shape or a line drawn with the mouse, you type the dimensions as numbers, and you see the cutting price after every change. You work on vector geometry: an arc stays an arc, a hole stays a circle, and you can download the finished part as DXF or SVG.
Already have a file to cut? Upload a file and see the price.
Where you start
I have a file
DXF, DWG, SVG, PDF, STEP, STL and more, one or several at once. The editor reads the outline and the holes and calculates the price straight away.
I'm starting from scratch
Fifteen ready-made shapes, from a rectangle and a circle to a slotted mounting plate, a perforated plate and a gear. You can also draw a shape with the mouse or your finger, or describe it in words.
I have a photo
A sketch on paper, a line drawing or a logo. The editor traces the outline and you give one number: the width of the whole part. A photo of a finished part won't do, because perspective distorts the dimensions.
Step by step
01 A 200 × 100 mm plate with holes in the corners
- 1.On the editor's start page choose “I'm starting from scratch”, then “Rectangle”.
- 2.Click the width figure on the drawing, type 200 and confirm. Change the height to 100 the same way.
- 3.In the toolbar open “More” and choose “Hole pattern”. Choose the “Corners” pattern, set the diameter to 8 mm and the distance from the edge to the centre of the hole to 20 mm, then press “Apply”.
- 4.Choose a material. You will see the price per piece on the “Your part” card.
- 5.Click “Confirm and get a quote”. You enter the number of pieces in the quote.
02 A new dimension for a part from a file, with the holes staying put
- 1.Choose “I have a file” and upload your drawing.
- 2.Click the width or the height and type the new dimension. The field does the arithmetic for you: you can type 184+10 or 10 cm.
- 3.The editor stretches the part in the middle. The holes stay the same distance from their own edges.
Want to enlarge everything, holes included? Use “Scale”. A file drawn in inches converts to millimetres with one click on “It was inches (×25.4)”.
03 A shape drawn with the mouse or your finger
- 1.Choose “I'm starting from scratch”, then “Draw it yourself”.
- 2.Draw the outline. You can fit up to 8 strokes at a time.
- 3.The editor shows three readings. “Literal” is the shape as you drew it; “Straightened” has straight lines and equal angles; “Recognised” is a clean circle, rectangle, slot or polygon. Choose the one that fits.
- 4.Click “Accept →” or press Enter, then type the dimensions as in the first task.
We can't cut an open line. The editor then offers “Close with a straight line” or “Draw the rest”.
04 A hole exactly where you want it
- 1.Choose “Hole”, or press O, and click on the part.
- 2.Drag the hole. It stops at snap points: the centre of the part, an axis, in line with another hole, the same distance from the edge.
- 3.Click the number for the distance from the edge, or the diameter, and type the exact value.
05 A change described in words
- 1.Type a command into the “Say what to change…” field, for example “add four 8 mm holes in the corners”. You can also open the field with the / key.
- 2.The editor shows the proposal on the drawing, marked “AI proposal”.
- 3.Accept it (Enter) or reject it (Esc). The part does not change without your consent.
Tools
| Tool | Key | What it does |
|---|---|---|
| Draw | N | You draw a shape with a line and the editor straightens it. |
| Dimension | D | You type the width, height, diameter or length of an edge. |
| Hole | O | A round hole where you click, with the diameter as a number. |
| Corners | R | Round or chamfer all the corners, or just one. |
| Cut-out | W | A rectangle or circle cut out of the part. At an edge it changes the outline. |
| Slot | Length, width and angle. | |
| Hole pattern | In the corners, in a grid or on a pitch circle. | |
| Rotate, Mirror, Scale | The whole part or a selected element. Scaling also converts from inches. | |
| Cut / Skip | You decide which lines go to cutting and which are only annotation. | |
| Text | Lettering cut right through. Bridges hold the centres of the letters in place. | |
| Nodes | You drag the points of the outline. A segment can be turned into an arc or a corner. | |
| Duplicate as a pattern | Ctrl+K | Copies of an element in a grid, on a circle, mirrored or along an edge. |
| Offset contour, Simplify, Close, Join | Ctrl+K | Tidying up the outline, from the palette of all commands. |
Keyboard shortcuts
- Ctrl+Kall commands in one window with a search box
- Ctrl+ZCtrl+Shift+Zundo and redo
- []move through the elements of the part; the arrow keys nudge the selected one
- /the “Say what to change…” field
- Escends hole or drawing mode
The editor checks the cutting rules
When something in the part won't cut cleanly in the chosen sheet, for example a hole that is too small, a card appears next to the part: “Proposal from the design guidelines”, with a ready-made fix. You accept it or click “Leave it”. To find out what kerf (the width of the cut) or a web (the strip of material between two cuts) means, open the “What does this mean?” window in the “More” menu.
Design guidelinesWhat the editor doesn't do
- It doesn't design bent parts. Make the flat pattern (the sheet-metal unfold) in your own software and upload it as a DXF at 1:1 scale.
- It doesn't edit 3D solids. From a STEP, STL, OBJ or 3MF file it takes the flat outline, and that is what you work on.
- It can't read dimensions from a photo of a finished part. For a part with dimensions use a DXF or PDF, or draw it here.
- It doesn't engrave. We don't offer engraving.
Questions
Have a file? Upload it and see the price straight away.
Drop files or click
Drawing DXF DWG SVG PDF LightBurn HPGL 3D model STEP STL OBJ 3MF Document DOCX XLSX PPTX Photo, scan JPG PNG HEIC WEBP TIFF BMP GIF several at once or a ZIP